01配置OpenVINO C++開發環境
配置OpenVINO C++開發環境的詳細步驟,請參考《在Windows中基于Visual Studio配置OpenVINO C++開發環境》。
02下載并轉換YOLOv5預訓練模型
下載并轉換YOLOv5預訓練模型的詳細步驟,請參考:《基于OpenVINO2022.2和蝰蛇峽谷優化并部署YOLOv5模型》,本文所使用的OpenVINO是2022.3 LTS版。
完成上述步驟后,可以獲得YOLOv5的IR模型文件:yolov5s.xml 和 yolov5s.bin,如下圖所示: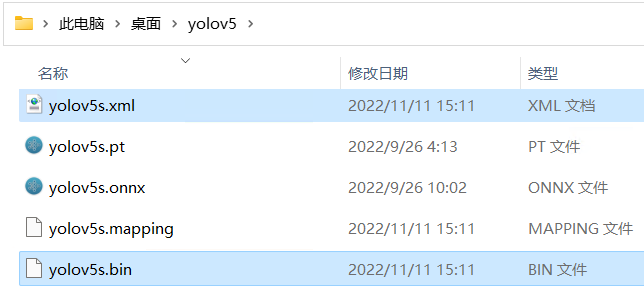
圖 1-1YOLOv5 IR模型文件
03使用OpenVINO Runtime C++ API編寫推理程序
一個端到端的AI推理程序,主要包含五個典型的處理流程:
1.采集圖像&圖像解碼
2.圖像數據預處理
3.AI推理計算
4.對推理結果進行后處理
5.將處理后的結果集成到業務流程 
圖 1-2端到端的AI推理程序處理流程
采集圖像&圖像解碼
OpenCV提供imread()函數將圖像文件載入內存
Matcv::imread(constString&filename, intflags=IMREAD_COLOR)
若是從視頻流(例如,視頻文件、網絡攝像頭、3D攝像頭(Realsense)等)中,一幀一幀讀取圖像數據到內存,則使用cv::VideoCapture類,對應范例代碼請參考OpenCV官方范例代碼:
https://github.com/opencv/opencv/tree/4.x/samples/cpp。 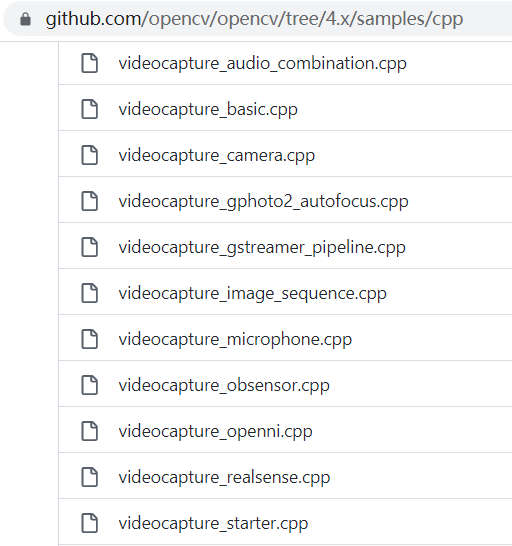
圖 1-3從視頻流讀取圖像幀范例
YOLOv5的圖像預處理
圖像數據輸入YOLOv5模型前需要做預處理,其主要工作有:使用Letterbox算法對圖像進行非變形放縮,然后完成轉換顏色通道、歸一化數據、更改數據布局和數值精度。
直接調用OpenCV的cv::resize()函數將原始圖像按照模型輸入要求的尺寸進行放縮,雖然實現起來簡單,但會導致圖像中的被檢測對象變形。Letterbox算法一種不會導致被檢測對象變形的縮放,主要步驟為:
1.計算寬高縮放比例,選擇較小那個縮放系數
2.計算縮放后的尺寸,原始圖片的長寬都乘以較小的縮放系數
3.計算短邊需要填充的灰邊數,將短邊的兩邊各自填充一半的灰行 參考YOLOv5的Letterbox算法實現方式,本文的Letterbox函數實現如下所示:
cv::Matletterbox(cv::Mat&img, std::vectornew_shape={640, 640}){
// Get current image shape [height, width]
// Refer to https://github.com/ultralytics/yolov5/blob/master/utils/augmentations.py#L111
intimg_h =img.rows;
intimg_w =img.cols;
// Compute scale ratio(new / old) and target resized shape
floatscale =std::min(new_shape[1] *1.0/img_h, new_shape[0] *1.0/img_w);
intresize_h =int(round(img_h *scale));
intresize_w =int(round(img_w *scale));
// Compute padding
intpad_h =new_shape[1] -resize_h;
intpad_w =new_shape[0] -resize_w;
// Resize and pad image while meeting stride-multiple constraints
cv::Mat resized_img;
cv::resize(img, resized_img, cv::Size(resize_w, resize_h));
// divide padding into 2 sides
floathalf_h =pad_h *1.0/2;
floathalf_w =pad_w *1.0/2;
// Compute padding boarder
inttop =int(round(half_h -0.1));
intbottom =int(round(half_h +0.1));
intleft =int(round(half_w -0.1));
intright =int(round(half_w +0.1));
// Add border
cv::copyMakeBorder(resized_img, resized_img, top, bottom, left, right, 0, cv::Scalar(114, 114, 114));
returnresized_img;
}
letterbox函數的運行結果如下圖所示:
圖 1-4letterbox放縮圖片的效果
轉換顏色通道、歸一化數據、更改數據布局和數值精度的操作可以由OpenCV提供的 Mat cv::blobFromImage()函數實現,或者由OpenVINO的預處理API實現。為了簡潔范例代碼,本文選擇調用cv::blobFromImage()函數。
執行AI推理計算
基于OpenVINO Runtime C++ API實現AI推理計算主要有兩種方式:一種是同步推理方式,一種是異步推理方式,本文主要介紹同步推理方式。
主要步驟有:
1.初始化Core類
2.編譯模型
3.創建推理請求infer_request
4.讀取圖像數據并做預處理
5.將預處理后的blob數據傳入模型輸入節點
6.調用infer()方法執行推理計算
7.獲得推理結果
基于OpenVINO Runtime C++API的同步推理代碼如下所示:
// -------- Step 1. Initialize OpenVINO Runtime Core --------
ov::Core core;
// -------- Step 2. Compile the Model --------
autocompiled_model =core.compile_model(model_file, "CPU");//GPU.1 is dGPU A770
// -------- Step 3. Create an Inference Request --------
ov::InferRequest infer_request =compiled_model.create_infer_request();
// -------- Step 4. Read a picture file and do the preprocess --------
cv::Mat img =cv::imread(image_file);//Load a picture into memory
std::vectorpaddings(3); //scale, half_h, half_w
cv::Mat resized_img =letterbox(img, paddings);//resize to (640,640) by letterbox
// BGR->RGB, u8(0-255)->f32(0.0-1.0), HWC->NCHW
cv::Mat blob =cv::blobFromImage(resized_img, 1/255.0, cv::Size(640, 640), cv::Scalar(0, 0, 0), true);
// -------- Step 5. Feed the blob into the input node of YOLOv5 -------
// Get input port for model with one input
autoinput_port =compiled_model.input();
// Create tensor from external memory
ov::Tensorinput_tensor(input_port.get_element_type(), input_port.get_shape(), blob.ptr(0));
// Set input tensor for model with one input
infer_request.set_input_tensor(input_tensor);
// -------- Step 6. Start inference --------
infer_request.infer();
// -------- Step 7. Get the inference result --------
autooutput =infer_request.get_output_tensor(0);
autooutput_shape =output.get_shape();
std::cout <
推理結果進行后處理
對于目標檢測應用,后處理主要是執行NMS(非極大值抑制)算法去除多余的檢測框,然后剩余的檢測框中提取出檢測框坐標(box)、置信度(confidence)和類別(class_id)。NMS算法本文直接使用了cv::NMSBoxes()。
經過后處理,獲得了經過NMS過濾后的檢測框坐標(box)、置信度(confidence)和類別(class_id)后,就可以將這些信息顯示在圖像上了。
04總 結
配置OpenVINO C++開發環境后,可以直接編譯運行yolov5_openvino_sync_dGPU.cpp,結果如下圖所示。
使用OpenVINO Runtime C++ API函數開發YOLOv5推理程序,簡單方便,并可以任意部署在英特爾CPU、集成顯卡和獨立顯卡上。
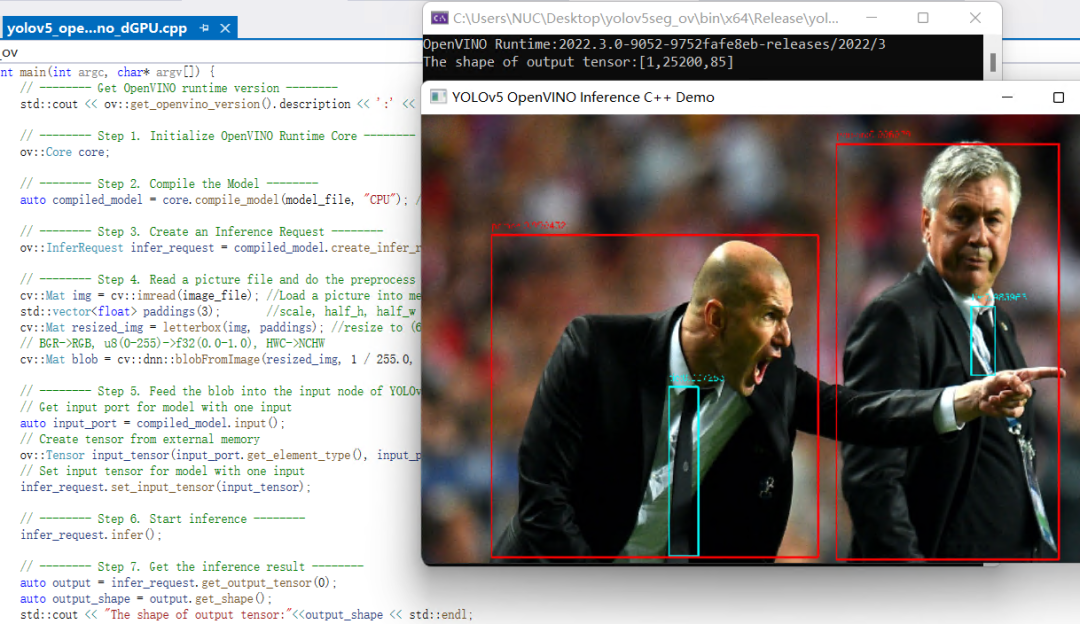
圖 1-5運行結果
審核編輯:劉清
-
C++語言
+關注
關注
0文章
147瀏覽量
6969 -
OpenCV
+關注
關注
30文章
628瀏覽量
41259 -
圖像解碼
+關注
關注
0文章
5瀏覽量
6980 -
API串口
+關注
關注
0文章
13瀏覽量
4837
原文標題:基于OpenVINO 在C++中部署YOLOv5模型
文章出處:【微信號:SDNLAB,微信公眾號:SDNLAB】歡迎添加關注!文章轉載請注明出處。
發布評論請先 登錄
相關推薦
手把手教你使用LabVIEW ONNX Runtime部署 TensorRT加速,實現YOLOv5實時物體識別
如何使用OpenVINO C++ API部署FastSAM模型

在C++中使用OpenVINO工具包部署YOLOv5-Seg模型

龍哥手把手教你學視覺-深度學習YOLOV5篇
怎樣使用PyTorch Hub去加載YOLOv5模型
在英特爾獨立顯卡上部署YOLOv5 v7.0版實時實例分割模型
用OpenVINO? C++ API編寫YOLOv8-Seg實例分割模型推理程序

三種主流模型部署框架YOLOv8推理演示
NNCF壓縮與量化YOLOv8模型與OpenVINO部署測試
在樹莓派上部署YOLOv5進行動物目標檢測的完整流程


 在C++中使用OpenVINO工具包部署YOLOv5模型


評論