介紹
本篇Codelab基于手勢處理和截屏能力,介紹了手勢截屏的實現過程。樣例主要包括以下功能:
- 根據下滑手勢調用全屏截圖功能。
- 全屏截圖,同時右下角有彈窗提示截圖成功。
- 根據雙擊手勢調用區域截圖功能。
- 區域截圖,通過調整選擇框大小完成。

相關概念
- Canvas:畫布組件,用于自定義繪制圖形。
- CanvasRenderingContext2D對象:使用RenderingContext在Canvas組件上進行繪制,繪制對象可以是矩形、文本、圖片等。
- 雙擊手勢:手指雙擊屏幕回調事件。
- 手指滑動手勢:手指在屏幕滑動回調事件。
相關權限
- 本篇Codelab用到屏幕截圖的能力,需要在配置文件module.json5里添加屏幕截圖的權限:ohos.permission.CAPTURE_SCREEN。
- 本篇Codelab需要使用的screenshot為系統接口。需要使用Full SDK手動從鏡像站點獲取,并在DevEco Studio中替換。
- 本篇Codelab使用的部分API僅系統應用可用,需要提升應用等級為system_core。
環境搭建
軟件要求
- [DevEco Studio]版本:DevEco Studio 3.1 Release。
- OpenHarmony SDK版本:API version 9。
硬件要求
- 開發板類型:[潤和RK3568開發板]。
- OpenHarmony系統:3.2 Release。
環境搭建
完成本篇Codelab我們首先要完成開發環境的搭建,本示例以RK3568開發板為例,參照以下步驟進行:
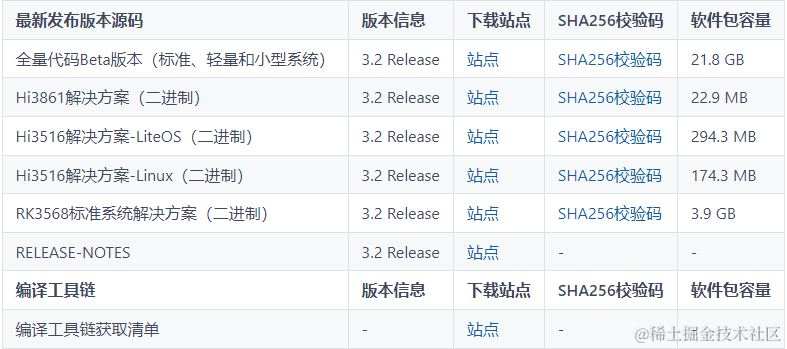
- [獲取OpenHarmony系統版本]:標準系統解決方案(二進制)。以3.2 Release版本為例:

- 搭建燒錄環境。
- [完成DevEco Device Tool的安裝]
- [完成RK3568開發板的燒錄]
- 搭建開發環境。
代碼結構解讀
本篇Codelab只對核心代碼進行講解,對于完整代碼,我們會在gitee中提供。
├──entry/src/main/ets           // 代碼區
│  ├──common
│  │  └──utils
│  │     ├──CommonConstants.ets	// 公共常量類
│  │     ├──DrawUtil.ets        // 畫布相關工具類
│  │     └──Logger.ets          // 日志打印類
│  ├──entryability
│  │  └──EntryAbility.ets       // 程序入口類
│  ├──model
│  │  └──OffsetModel.ets        // 區域截圖坐標相關工具類
│  ├──pages
│  │  └──GestureScreenshot.ets  // 主界面
│  └──view
│     ├──AreaScreenshot.ets     // 自定義區域截屏組件類
│     └──ScreenshotDialog.ets   // 自定義截屏顯示彈窗組件類
└──entry/src/main/resources     // 資源文件目錄
構建截屏主頁面
使用下滑手勢,進行全屏截圖并展示圖片。效果如圖所示:

主界面主要實現以下功能:
- 下滑手勢綁定在主界面上,雙擊手勢綁定在區域手勢的最底層Stack組件上。
- 如果使用下滑手勢,就進行全屏截圖并展示圖片。
- 如果使用雙擊手勢,就喚起區域截圖相關組件。

// 區域截圖最底層,當主頁面縮放后會露出,設置為黑色
Stack() {
  // 主頁面布局
  Column() {
    ...
  })
  // 添加滑動手勢事件
  .gesture(
    // fingers:觸發手指數 direction:觸發方向 distance:觸發滑動距離
    PanGesture({
      fingers: 1,
      direction: PanDirection.Down,
      distance: CommonConstants.MINIMUM_FINGER_DISTANCE
    })// 觸發開始回調
      .onActionStart(() = > {
        let screenshotOptions: screenshot.ScreenshotOptions = {
          rotation: 0
        };
        screenshot.save(screenshotOptions, (err: Error, data: image.PixelMap) = > {
          if (err) {
            Logger.error(`Failed to save the screenshot. Error:${ JSON.stringify(err) }`);
          }
          if (this.pixelMap !== undefined) {
            this.pixelMap.release();
          }
          this.pixelMap = data;
          this.dialogController.open();
        });
      })
  )
  .scale(this.scaleNum)

  // 區域截圖相關組件
  AreaScreenshot({ showScreen: this.showScreen, pixelMap: this.pixelMap, scaleNum: this.scaleNum })
}
.backgroundColor($r('app.color.black_area'))
// 添加雙擊手勢事件
.gesture(
  TapGesture({ count: 2 })
    .onAction(() = > {
      this.showScreen = true;
      this.scaleNum = {
        x: CommonConstants.X_SCALE_DOWN,
        y: CommonConstants.Y_SCALE_DOWN
      }
    })
)
構建區域截圖組件
本章節將完成區域選擇框的繪制并完成區域截圖,效果如圖所示:

在繪制區域選擇框之前,首先需要在AreaScreenshot.ets的aboutToAppear方法中獲取屏幕的寬和高,并初始化offsetModel和drawUtil對象(初始化參數為屏幕的寬高)。offsetModel對輸入的坐標進行計算和更改,drawUtil使用offsetModel的坐標在屏幕上繪制區域選擇框。
// AreaScreenshot.ets
aboutToAppear() {
  window.getLastWindow(getContext(this))
    .then((window) = > {
      let property = window.getWindowProperties();
      this.systemBarHeight = property.windowRect.top;

      drawUtil.initDrawUtil(
        this.canvasRenderingContext,
        px2vp(property.windowRect.width),
        px2vp(property.windowRect.height)
      );

      offsetModel.initOffsetModel(
        px2vp(property.windowRect.width),
        px2vp(property.windowRect.height)
      );

      // 在展示截圖的時候,用于計算圖片大小
      this.screenAspectRatio = px2vp(property.windowRect.height) / px2vp(property.windowRect.width);
    })
    .catch((err: Error) = > {
      Logger.error(`window loading has error: ${ JSON.stringify(err) }`);
    })
}
在AreaScreenshot.ets布局頁面中添加Canvas組件,通過showScreen變量控制局部截屏頁面的顯示,并控制主頁面的縮放。步驟如下:
- 根據手指按下的位置確定需要移動的邊框。
- 手指移動后,更新offsetModel記錄的坐標信息。
- 根據offsetModel提供的坐標,使用drawUtil繪制區域選擇框。
- 點擊保存按鈕后,設置截屏區域坐標。
- 根據截屏區域坐標進行區域截屏。
// AreaScreenshot.ets
// 關閉區域截屏相關組件,并還原主頁面
private resetParameter() {
  this.showScreen = false;
  this.scaleNum = {
    x: CommonConstants.NO_SCALE_DOWN,
    y: CommonConstants.NO_SCALE_DOWN
  };
  offsetModel.resetDefaultOffSet();
}

// 使用if渲染,控制區域截圖相關組件的顯隱
if (this.showScreen) {
  Stack() {
    Canvas(this.canvasRenderingContext)
      ...
      .onReady(() = > {
        // 通過draw方法繪制選擇框和非高亮區域
        drawUtil.draw();
      })
    // 截圖的工具欄
    Row() {
      ...
      // 區域截圖并展示圖像
      Image($r('app.media.ic_save'))
        .onClick(() = > {
          let screenshotOptions: screenshot.ScreenshotOptions = {
            // 截屏區域Rect參數
            screenRect: {
              left: vp2px(offsetModel.getXLeft()),
              top: vp2px(offsetModel.getYTop()) + this.systemBarHeight,
              width: vp2px(offsetModel.getWidth()),
              height: vp2px(offsetModel.getHeight())
            } as screenshot.Rect,
            // 截圖的大小
            imageSize: {
              width: vp2px(offsetModel.getWidth()),
              height: vp2px(offsetModel.getHeight())
            } as screenshot.Size,
            rotation: 0,
            displayId: 0
          };
          screenshot.save(screenshotOptions, (err: Error, data: image.PixelMap) = > {
            if (err) {
              Logger.error(`Failed to save the screenshot. Error:${JSON.stringify(err)}`);
            }
            if (this.pixelMap !== undefined) {
              this.pixelMap.release();
            }
            this.pixelMap = data;
            // 使用彈窗組件展示截完的圖片
            this.dialogController.open();
          });
          this.resetParameter();
        })
    }
    ...
    // 根據手指位置調整選擇框大小和位置
    .onTouch((event: TouchEvent) = > {
      switch(event.type) {
        case TouchType.Down:
          // 根據手指位置,判斷移動哪個坐標
          offsetModel.setXLocationType(event.touches[0].screenX);
          offsetModel.setYLocationType(event.touches[0].screenY);
          break;
        case TouchType.Move:
          // 更新坐標信息,并保證坐標值合法
          offsetModel.resetOffsetXY(event.touches[0].screenX, event.touches[0].screenY);
          drawUtil.draw();
          break;
        default:
          break;
      }
    })
}
區域選擇框工具類的實現
在構建區域截圖組件中介紹了OffsetModel和DrawUtil兩個工具類,本章節介紹一下具體的實現步驟。
使用OffsetModel校驗坐標的范圍,并保存坐標相關信息。
- 在初始化對象的時候,根據屏幕的縮放比例計算出黑色區域的寬高。
- 使用setXLocationType方法和setYLocationType方法,判斷需要移動的x、y坐標位置。
- 根據傳入的x、y坐標值,更改offset對應的坐標值,并保證選擇框的寬高大于等于預設的選擇框的最小值。
- 再次校驗offset坐標值,是否超出可截屏區域。
// OffsetModel.ets
public initOffsetModel(width: number, height: number) {
  ...
  this.blackAreaWidth = this.screenWidth * (1 - CommonConstant.X_SCALE_DOWN);
  this.blackAreaWidth = this.blackAreaWidth / CommonConstant.BLACK_AREA_NUM;
  this.blackAreaHeight = this.screenHeight * (1 - CommonConstant.Y_SCALE_DOWN);
  this.blackAreaHeight = this.blackAreaHeight / CommonConstant.BLACK_AREA_NUM;
}

// 判斷x坐標位置
public setXLocationType(offsetX: number) {
  if (offsetX > this.offsetXRight - CommonConstant.OFFSET_RANGE &&
    offsetX < this.offsetXRight + CommonConstant.OFFSET_RANGE) {
    this.xLocationType = XLocationEnum.XRight;
  } else if (offsetX > this.offsetXLeft - CommonConstant.OFFSET_RANGE &&
    offsetX < this.offsetXLeft + CommonConstant.OFFSET_RANGE) {
    this.xLocationType = XLocationEnum.XLeft;
  } else {
    this.xLocationType = XLocationEnum.noChange;
  }
}

// 判斷y坐標位置
public setYLocationType(offsetY: number) {
  ...
}

// 根據參數改變坐標值
public resetOffsetXY(offsetX: number, offsetY: number) {
  if (this.xLocationType === XLocationEnum.XLeft) {
    this.offsetXLeft = this.offsetXRight - offsetX < CommonConstant.OFFSET_RANGE * 2 ?
      this.offsetXLeft : offsetX;
  }
  ...

  this.checkOffsetXY();
}

// 再次校驗坐標值,是否超出可截屏區域
private checkOffsetXY() {
  this.offsetXLeft = this.offsetXLeft < this.blackAreaWidth ? this.blackAreaWidth : this.offsetXLeft;
  this.offsetXRight = this.offsetXRight > this.screenWidth - this.blackAreaWidth ?
    this.screenWidth - this.blackAreaWidth : this.offsetXRight;
  this.offsetYTop = this.offsetYTop < this.blackAreaHeight ? this.blackAreaHeight : this.offsetYTop;
  this.offsetYBottom = this.offsetYBottom > this.screenHeight - this.blackAreaHeight ?
    this.screenHeight - this.blackAreaHeight : this.offsetYBottom;
}
DrawUtil主要提供繪制方法,用于繪制區域選擇框。
// DrawUtil.ets
// 繪制整個區域選擇框
public draw() {
  this.offsetXLeft = offsetModel.getXLeft();
  this.offsetXRight = offsetModel.getXRight();
  this.offsetYTop = offsetModel.getYTop();
  this.offsetYBottom = offsetModel.getYBottom();

  // 填充非高亮區域
  this.drawScreenSelection();
  // 繪制框選線
  this.drawLines();
}

// 填充非高亮區域,設置回形區域并填充顏色
private drawScreenSelection() {
  this.canvasContext.clearRect(0, 0, this.screenWidth, this.screenHeight)
  this.canvasContext.beginPath();

  this.canvasContext.moveTo(0, 0);
  this.canvasContext.lineTo(this.screenWidth, 0);
  this.canvasContext.lineTo(this.screenWidth, this.screenHeight);
  this.canvasContext.lineTo(0, this.screenHeight);
  this.canvasContext.closePath();

  this.canvasContext.moveTo(this.offsetXRight, this.offsetYTop);
  this.canvasContext.lineTo(this.offsetXLeft, this.offsetYTop);
  this.canvasContext.lineTo(this.offsetXLeft, this.offsetYBottom);
  this.canvasContext.lineTo(this.offsetXRight, this.offsetYBottom);

  this.canvasContext.globalAlpha = Constants.UNSELECT_AREA_ALPHA;
  this.canvasContext.fillStyle = Constants.UNSELECT_AREA_COLOR;
  this.canvasContext.closePath();
  this.canvasContext.fill();
}

// 繪制框選線
private drawLines() {
  this.canvasContext.beginPath();
  ...
  this.canvasContext.moveTo(
    (this.offsetXLeft + Constants.LINES_MAX_LENGTH),
    (this.offsetYTop - Constants.GAP_WIDTH)
  );
  this.canvasContext.lineTo(
    (this.offsetXLeft - Constants.GAP_WIDTH),
    (this.offsetYTop - Constants.GAP_WIDTH)
  );
  this.canvasContext.lineTo(
    (this.offsetXLeft - Constants.GAP_WIDTH),
    (this.offsetYTop + Constants.LINES_MAX_LENGTH)
  );
  ...
  this.canvasContext.stroke();
}
展示截圖
采用彈窗組件展示截屏,需要在aboutToAppear方法中計算對應的寬度:
- 截圖長寬比小于或者等于屏幕長寬比:此截圖展示時和全屏截圖展示時等寬。
- 截圖長寬比大于屏幕長寬比:此截圖展示時和全屏截圖展示時等長,通過計算對應的寬來實現。
// ScreenshotDialog.ets
aboutToAppear() {
  this.getDialogWidth();
}
...
private async getDialogWidth() {
  if (this.pixelMap !== undefined) {
    let info = await this.pixelMap.getImageInfo();
    let pixelMapAspectRatio = info.size.height / info.size.width;

    if ((this.screenAspectRatio !== -1) && (pixelMapAspectRatio > this.screenAspectRatio)) {
      let width = CommonConstants.HEIGHT_FIRST / pixelMapAspectRatio * this.screenAspectRatio;
      this.dialogWidth = width + '%';
    } else {
      this.dialogWidth = CommonConstants.WIDTH_FIRST;
    }
  }
}
審核編輯 黃宇
-
鴻蒙
+關注
關注
57文章
2309瀏覽量
42740 -
OpenHarmony
+關注
關注
25文章
3659瀏覽量
16152
發布評論請先 登錄
相關推薦
【HarmonyOS】應用開發文檔
HarmonyOS應用開發-ets基礎手勢LongPressGesture
HarmonyOS應用開發ets基礎手勢TapGesture
HarmonyOS應用API手勢方法-綁定手勢方法
HarmonyOS應用API手勢方法-PanGesture
華為榮耀8花式截屏,4種截屏方式你都知道嗎?
華為mate9手機怎么截屏?華為mate9截圖實用教程分享
30款老產品用戶正式體驗EMUI 10.1,快速切換應用手勢+單指關節截屏超香
小米 11 支持指關節截屏以及指關節畫字母 V 啟動自定義功能
嵌入式Linux開發環境搭建-(7)嵌入式Linux開發板截屏工具gsnap移植


 HarmonyOS開發實例:【手勢截屏】


評論