準備發送Flash Writer文件
Flash_Writer_SCIF_RZG2L_SMARC_PMIC_DDR4_2GB_1PCS.mot
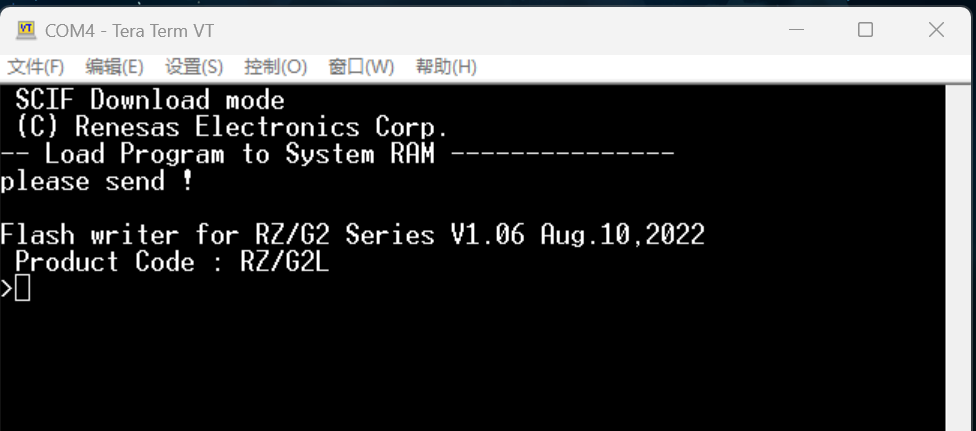
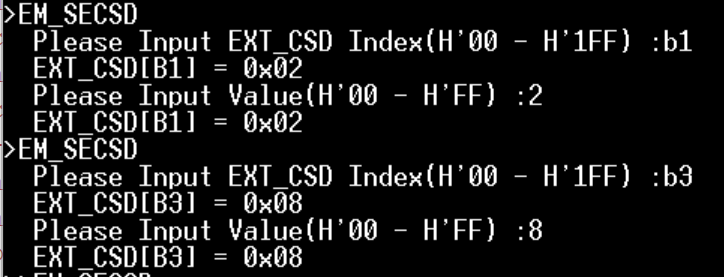
輸入指令
>EM_SECSD
 Please Input EXT_CSD Index(H'00 - H'1FF) :b1
 EXT_CSD[B1] = 0x02
 Please Input Value(H'00 - H'FF) :2
 EXT_CSD[B1] = 0x02
>EM_SECSD
 Please Input EXT_CSD Index(H'00 - H'1FF) :b3
 EXT_CSD[B3] = 0x08
 Please Input Value(H'00 - H'FF) :8
 EXT_CSD[B3] = 0x08
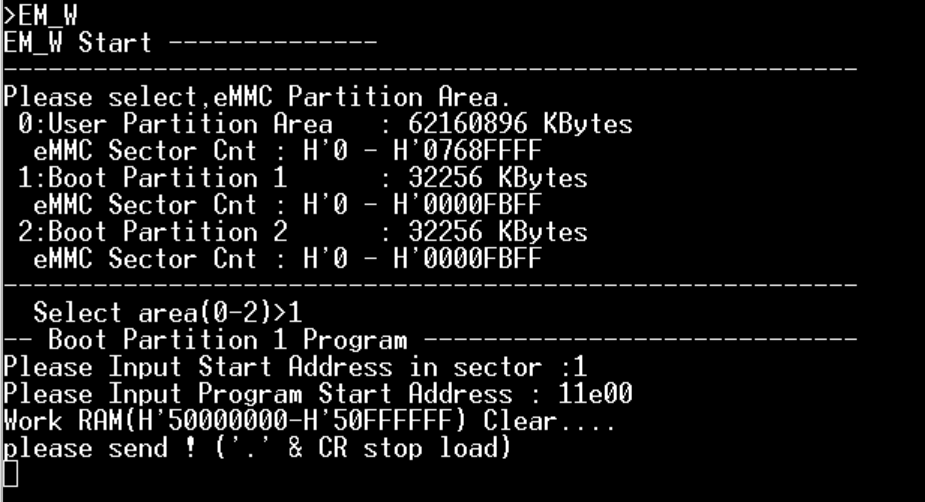
發送文件bl2_bp-smarc-rzg2l_pmic.srec
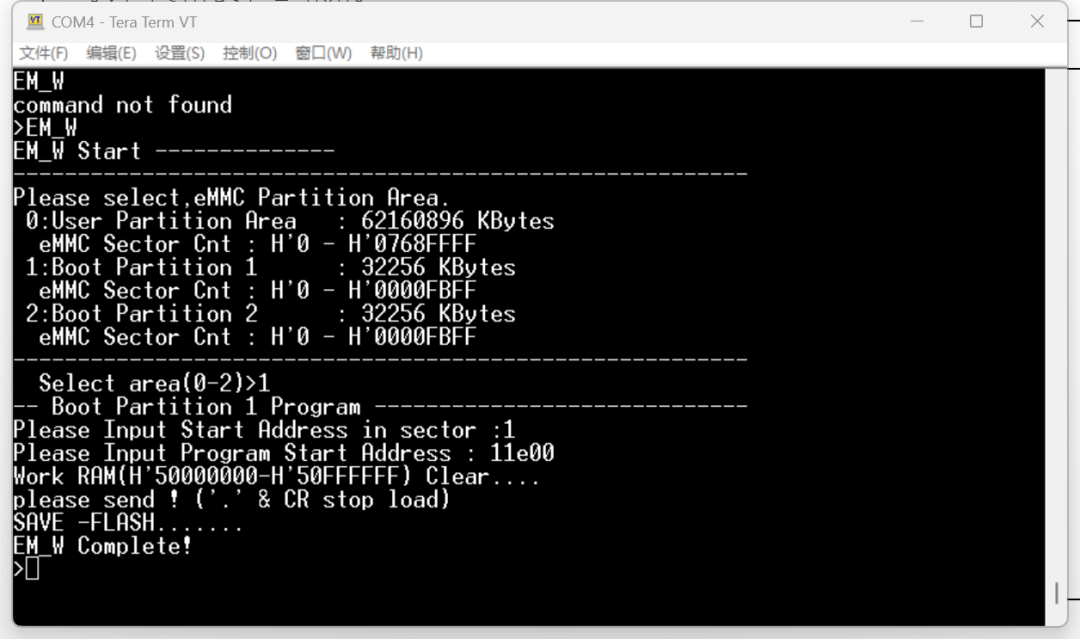
>EM_W
EM_W Start --------------
---------------------------------------------------------
Please select,eMMC Partition Area.
 0:User Partition Area  : 62160896 KBytes
 eMMC Sector Cnt : H'0 - H'0768FFFF
 1:Boot Partition 1   : 32256 KBytes
 eMMC Sector Cnt : H'0 - H'0000FBFF
 2:Boot Partition 2   : 32256 KBytes
 eMMC Sector Cnt : H'0 - H'0000FBFF
---------------------------------------------------------
 Select area(0-2)>1
-- Boot Partition 1 Program -----------------------------
Please Input Start Address in sector :1
Please Input Program Start Address : 11e00
Work RAM(H'50000000-H'50FFFFFF) Clear....
please send ! ('.' & CR stop load)
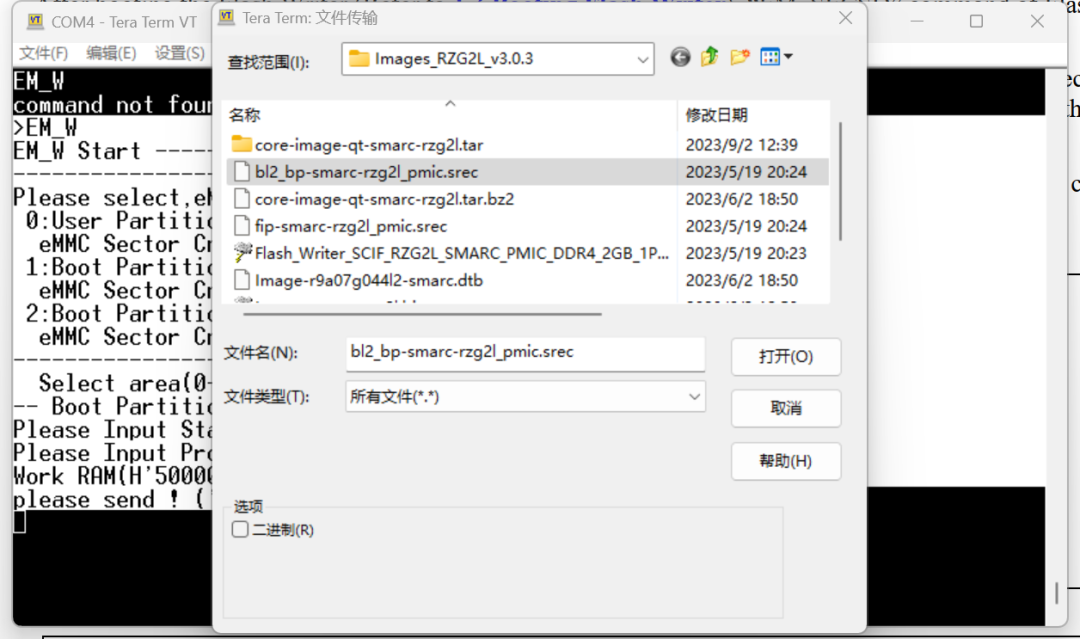
準備發送文件fip-smarc-rzg2l_pmic.srec
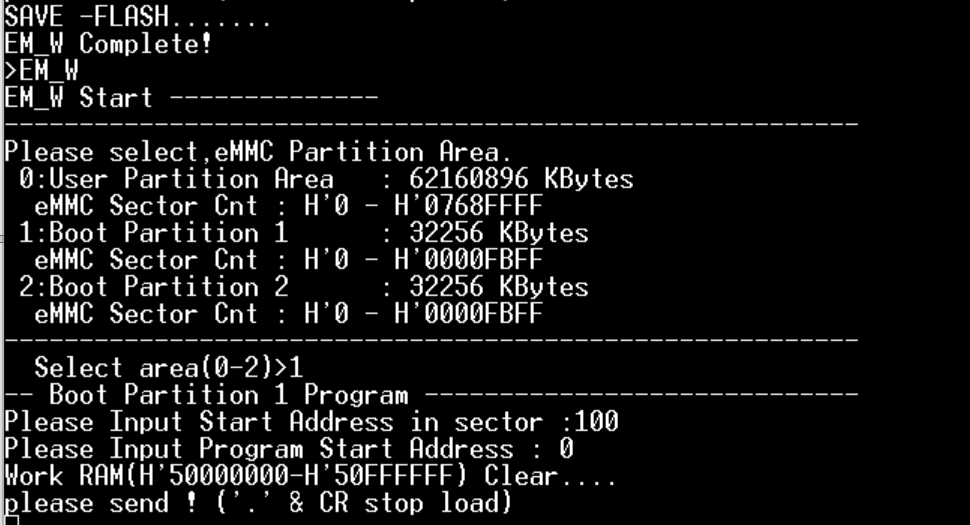
>EM_W
EM_W Start --------------
---------------------------------------------------------
Please select,eMMC Partition Area.
 0:User Partition Area  : 62160896 KBytes
 eMMC Sector Cnt : H'0 - H'0768FFFF
 1:Boot Partition 1   : 32256 KBytes
 eMMC Sector Cnt : H'0 - H'0000FBFF
 2:Boot Partition 2   : 32256 KBytes
 eMMC Sector Cnt : H'0 - H'0000FBFF
---------------------------------------------------------
 Select area(0-2)>1
-- Boot Partition 1 Program -----------------------------
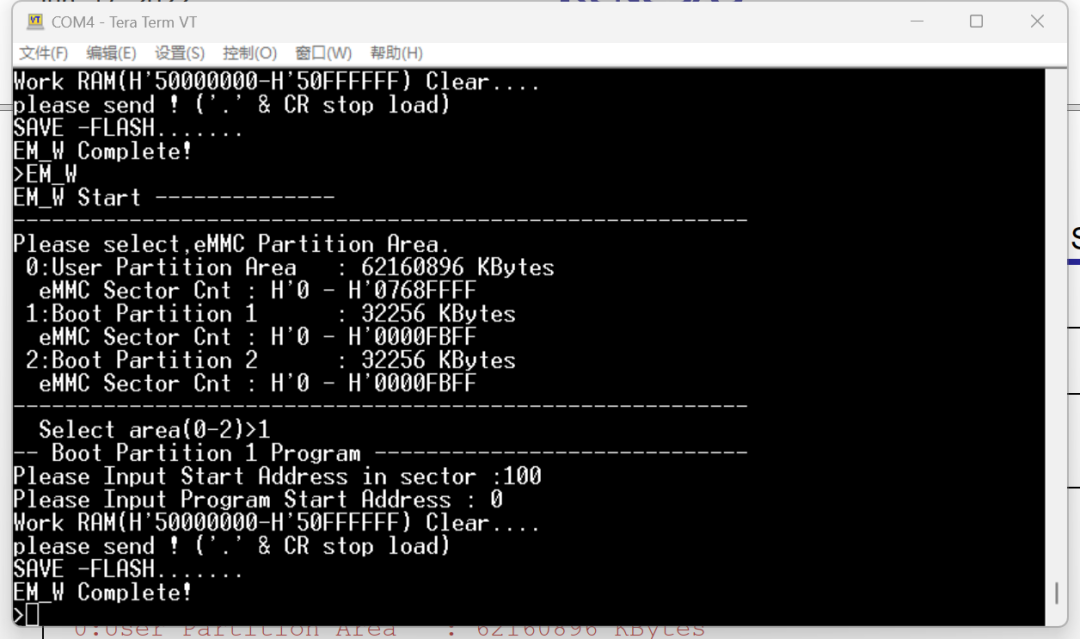
Please Input Start Address in sector :100
Please Input Program Start Address : 0
Work RAM(H'50000000-H'50FFFFFF) Clear....
please send ! ('.' & CR stop load)
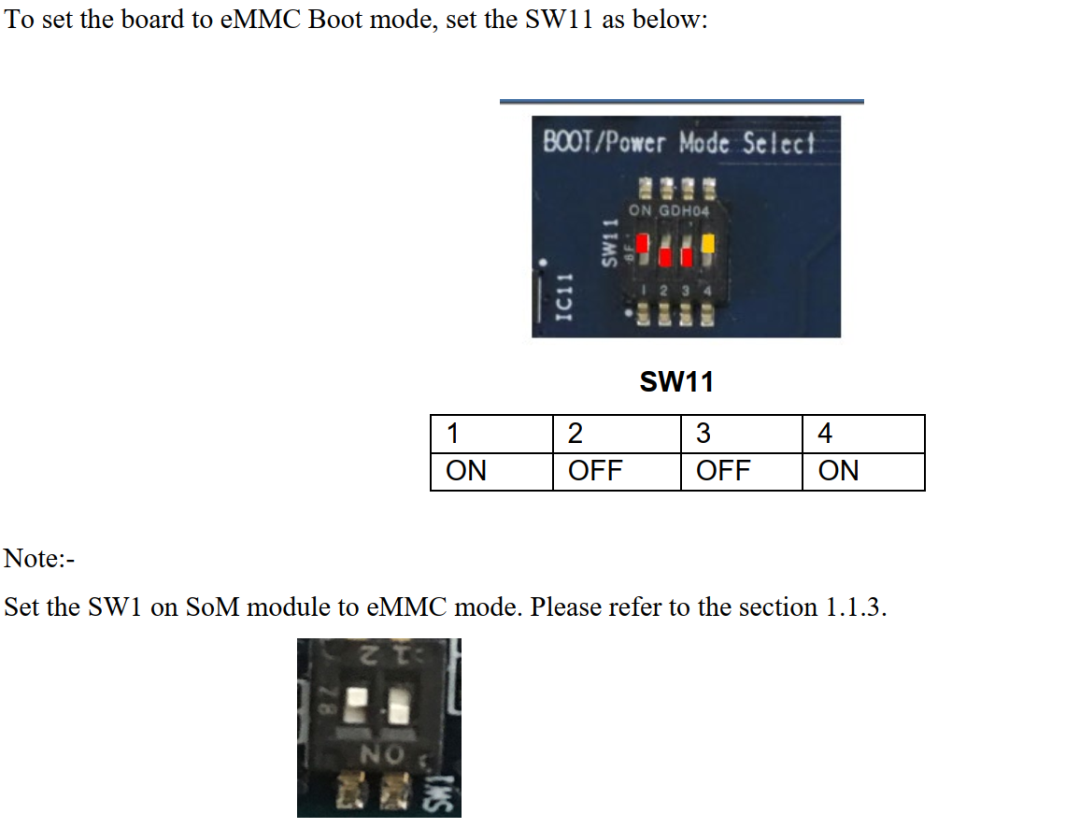
斷開連接,關閉電源,更改撥碼開關。
接上SD卡(SD卡需要提前做好分區以及格式),將Linux kernel、Devise tree、root filesystem復制到/media/user/rootfs/home/root/
輸入命令
$ sudo cp ~/rzg_vlp_v3.0.3/build/tmp/deploy/images/smarc-rzg2l/Image-smarc-rzg2l.bin /media/venon/rootfs/home/root/
$ sudo cp ~/rzg_vlp_v3.0.3/build/tmp/deploy/images/smarc-rzg2l/Image-r9a07g044l2-smarc.dtb /media/venon/rootfs/home/root/
$ sudo cp ~/rzg_vlp_v3.0.3/build/tmp/deploy/images/smarc-rzg2l/core-image-qt-smarc-rzg2l.tar.bz2 /media/venon/rootfs/home/root/
?
 ?
?
插入SD卡,啟動G2L EVK,啟動Linux后以root用戶身份登錄

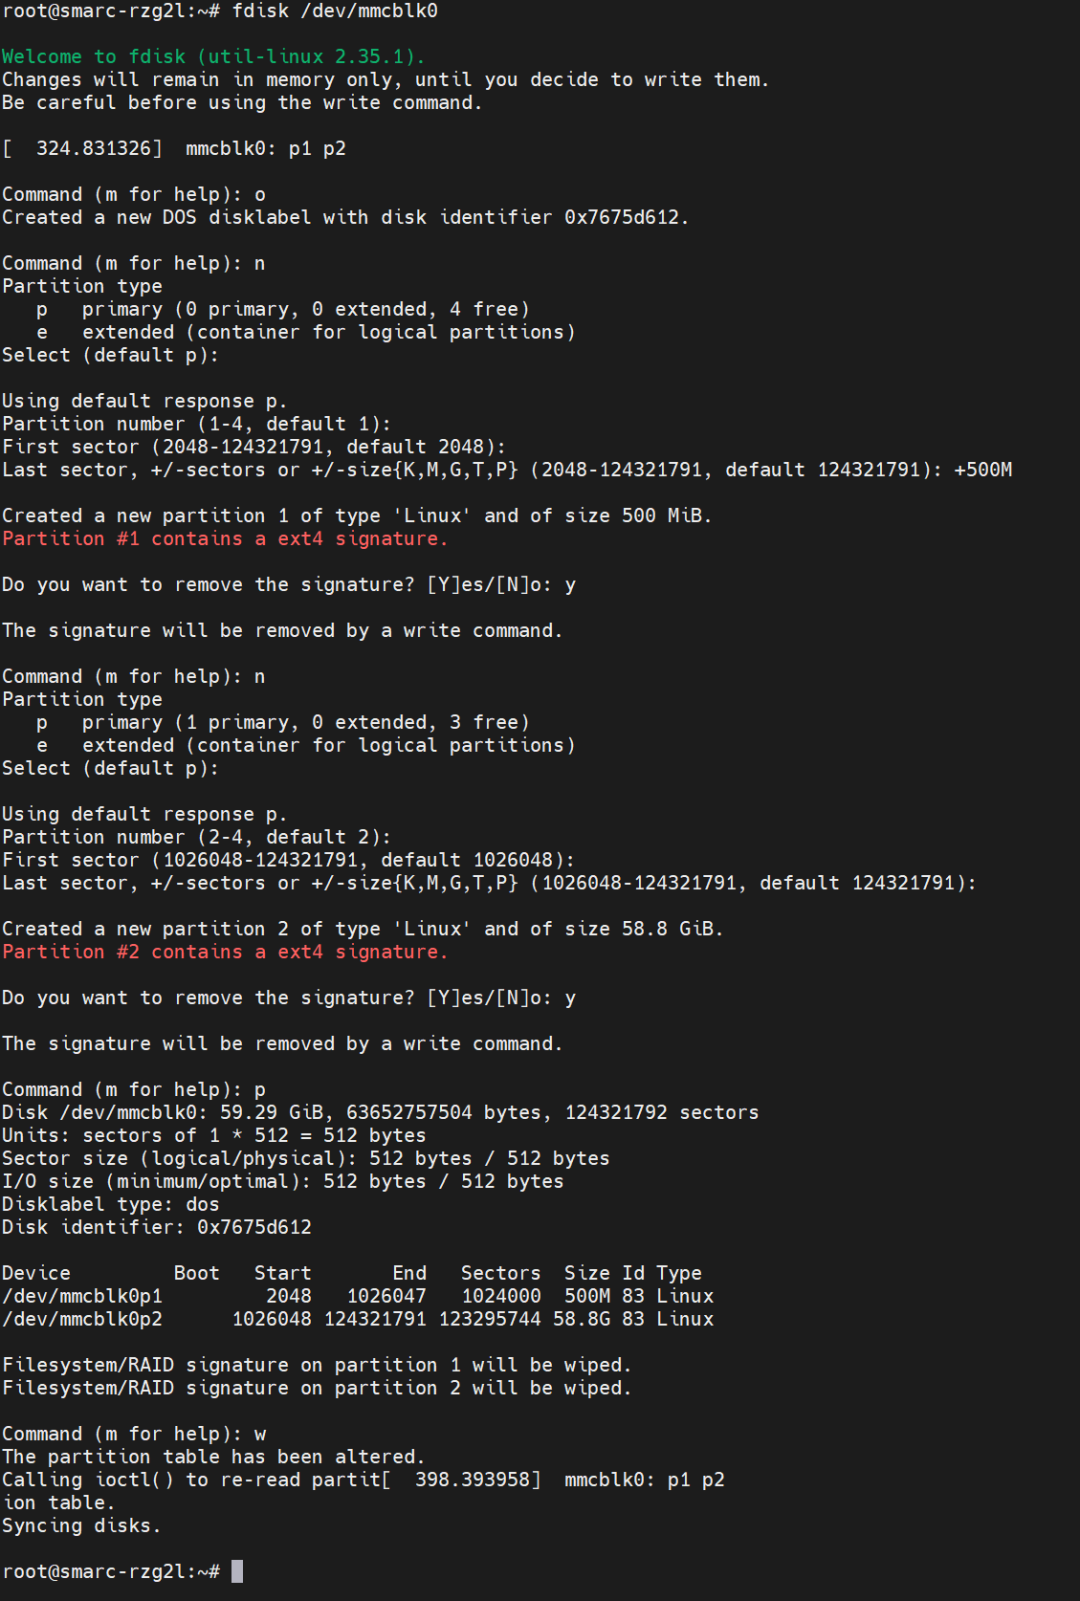
在eMMC中創建分區
輸入如下命令
root@smarc-rzv2l:~# fdisk /dev/mmcblk0
Welcome to fdisk (util-linux 2.35.1).
Changes will remain in memory only, until you decide to write them.
Be careful before using the write command.
Command (m for help): o
Created a new DOS disklabel with disk identifier 0xf3d53104.
Command (m for help): n
Partition type
p primary (0 primary, 0 extended, 4 free)
e extended (container for logical partitions)
Select (default p): (Push the enter key)
Partition number (1-4, default 1): (Push the enter key)
First sector (2048-124321791, default 2048): (Push the enter key)
Last sector, +/-sectors or +/-size{K,M,G,T,P} (2048-124321791, default 1243217
91): +500M
Created a new partition 1 of type 'Linux' and of size 500 MiB.
Command (m for help): n
Partition type
p primary (1 primary, 0 extended, 3 free)
e extended (container for logical partitions)
Select (default p): (Push the enter key)
Using default response p.
Partition number (2-4, default 2): (Push the enter key)
First sector (1026048-124321791, default 1026048): (Push the enter key)
Last sector, +/-sectors or +/-size{K,M,G,T,P} (1026048-124321791, default 1243
21791): (Push the enter key)
Created a new partition 2 of type 'Linux' and of size 58.8 GiB.
Command (m for help): p
Disk /dev/mmcblk0: 59.29 GiB, 63652757504 bytes, 124321792 sectors
Units: sectors of 1 * 512 = 512 bytes
Sector size (logical/physical): 512 bytes / 512 bytes
I/O size (minimum/optimal): 512 bytes / 512 bytes
Disklabel type: dos
Disk identifier: 0xf3d53104
Device Boot Start End Sectors Size Id Type
/dev/mmcblk0p1 2048 1026047 1024000 500M 83 Linux
/dev/mmcblk0p2 1026048 124321791 123295744 58.8G 83 Linux
Command (m for help): w
The partition table has been altered.
Calling ioctl() to re-read partition table.
Syncing disks.
root@smarc-rzv2l:~#
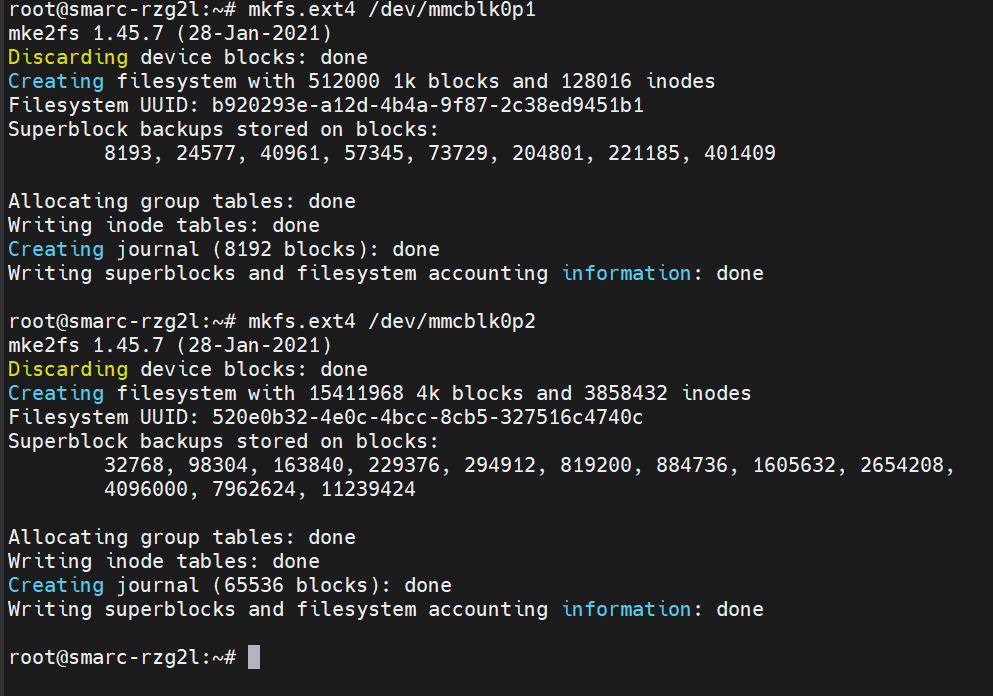
格式化eMMC
輸入命令
root@smarc-rzv2l:~# mkfs.ext4 /dev/mmcblk0p1
root@smarc-rzv2l:~# mkfs.ext4 /dev/mmcblk0p2
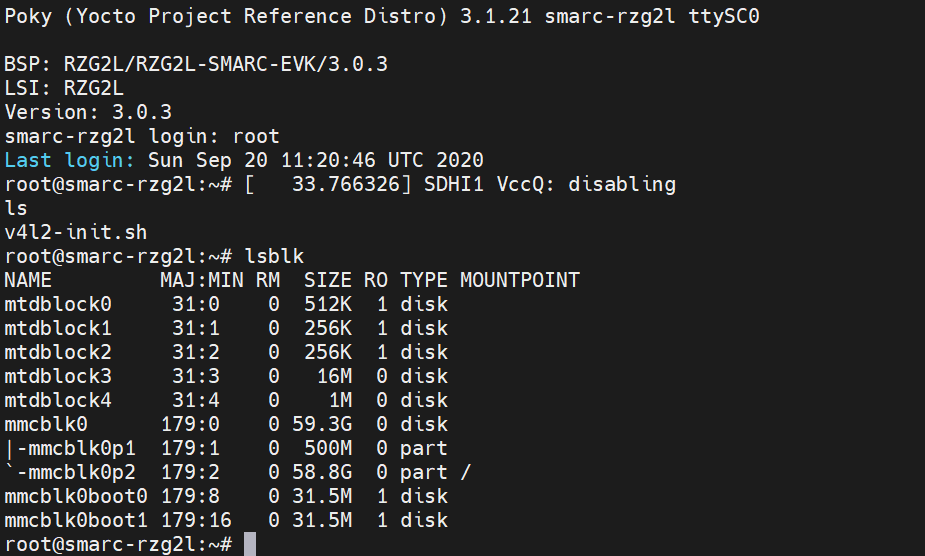
格式化eMMC并寫入內核、設備樹和rootfs
root@smarc-rzg2l:~# mount /dev/mmcblk0p1 /mnt/
root@smarc-rzg2l:~# cp Image-smarc-rzg2l.bin /mnt/
root@smarc-rzg2l:~# cp Image-r9a07g044l2-smarc.dtb /mnt/
root@smarc-rzg2l:~# umount /dev/mmcblk0p1
root@smarc-rzg2l:~# mount /dev/mmcblk0p2 /mnt/root@smarc-rzg2l:~# tar xf /home/root/core-image-qt-smarc-rzg2l.tar.bz2 -C /mnt/
root@smarc-rzg2l:~# umount /dev/mmcblk0p2

按下復位按鍵SW10,或者輸入命令reboot重啟設備,配置U-boot環境變量。
=> setenv bootargs 'root=/dev/mmcblk0p2 rootwait'
=> setenv bootcmd 'mmc dev 1; ext4load mmc 0:1 0x48080000 Image-smarc-rzg2l.bin; ext4load mmc 0:1 0x48000000 Image-r9a07g044l2-smarc.dtb; booti 0x48080000 - 0x48000000'
=> saveenv
Saving Environment to MMC... Writing to MMC(0)... OK

按下復位按鍵或者輸入命令‘reset’。重啟設備。
審核編輯:劉清
-
FlaSh
+關注
關注
10文章
1588瀏覽量
147260 -
SD卡
+關注
關注
2文章
550瀏覽量
63418 -
DDR4
+關注
關注
12文章
303瀏覽量
40485 -
u-boot
+關注
關注
0文章
118瀏覽量
38125
原文標題:RZ/G2L Demo調試經驗分享(5)[完結]
文章出處:【微信號:瑞薩MCU小百科,微信公眾號:瑞薩MCU小百科】歡迎添加關注!文章轉載請注明出處。
發布評論請先 登錄
相關推薦
G2L系列 核心板 -RZ/G2L 處理器簡介|框架圖|功耗|原理圖及硬件設計指南
【飛凌RZ/G2L開發板試用體驗】+01.開箱(zmj)
RZ/G2L Demo調試經驗流程分享(1)


 RZ/G2L Demo調試經驗分享(5)





評論