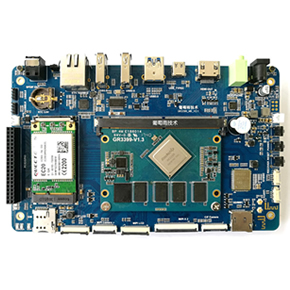
本文以飛凌嵌入式RK3399開發板為基礎講解,主要介紹了Ubuntu系統下雙屏顯示及異觸,其它RK3399平臺請參考使用!
xrandr命令
“xrandr”是一款官方的 RandR擴展配置工具,它可以設置屏幕顯示的大小、方向、鏡像等。對于多屏幕顯示的情況,可以使用xrandr進行管理。
參考鏈接: https://wiki.archlinux.org/index.php/xrandr_(%E7%AE%80%E4%BD%93%E4%B8%AD%E6%96%87)
?
forlinx@forlinx:~$ xrandr --help
usage: xrandr [options]
  where options are:
  --display  or -d
  --help
  -o
            or --orientation
  -q        or --query
  -s /x or --size /x
  -r  or --rate  or --refresh
  -v        or --version
  -x        (reflect in x)
  -y        (reflect in y)
  --screen
  --verbose
  --current
  --dryrun
  --nograb
  --prop or --properties
  --fb x
  --fbmm x
  --dpi /
  --output
      --auto
      --mode
      --preferred
      --pos x
      --rate  or --refresh
      --reflect normal,x,y,xy
      --rotate normal,inverted,left,right
      --left-of
      --right-of
      --above
      --below
      --same-as
      --set
      --scale x
      --scale-from x
      --transform ,,,,,,,,
      --off
      --crtc
      --panning x[++[/x++[////]]]
      --gamma ::
      --brightness
      --primary
  --noprimary
  --newmode
            [flags...]
            Valid flags: +HSync -HSync +VSync -VSync
                         +CSync -CSync CSync Interlace DoubleScan
  --rmmode
  --addmode
  --delmode
  --listproviders
  --setprovideroutputsource
  --setprovideroffloadsink
  --listmonitors
  --listactivemonitors
  --setmonitor  {auto|/x/++} {none|,,...}
  --delmonitor ,inverted,left,right,0,1,2,3>,inverted,left,right,0,1,2,3>
OK3399-C Ubuntu系統支持xrandr命令管理多屏擴展顯示。同時接入eDP屏幕和HDMI屏幕,系統會默認非熱插拔顯示設備作為主屏,所以eDP會被識別為primary screen。默認會設置兩個屏幕為擴展顯示。
forlinx@forlinx:~$ xrandr
Screen 0: minimum 320 x 200, current 2560 x 1440, maximum 8192 x 8192
eDP-1 connected primary 1920x1080+0+0 (normal left inverted right x axis y axis) 276mm x 156mm
   1920x1080     60.00*+
HDMI-1 connected 2560x1440+0+0 (normal left inverted right x axis y axis) 597mm x 336mm
   2560x1440     59.95*
   1920x1080     60.00    50.00    59.94
   1680x1050     59.88
   1280x1024     75.02    60.02
   1440x900      59.90
   1280x960      60.00
   1280x720      60.00    50.00    59.94
   1024x768      75.03    70.07    60.00
   832x624       74.55
   800x600       72.19    75.00    60.32    56.25
   720x576       50.00
   720x480       60.00    59.94
   640x480       75.00    72.81    66.67    60.00    59.94
   720x400       70.08
可以使用xrandr在兩個屏幕中選擇哪個做主屏,哪個做副屏。
xrandr --output eDP-1 --right-of HDMI-1 --auto
xrandr --output HDMI-1 --same-as eDP-1 --auto
forlinx@forlinx:~$ xinput --help
usage :
        xinput get-feedbacks
        xinput set-ptr-feedback
        xinput set-integer-feedback
        xinput get-button-map
        xinput set-button-map  [ [...]]
        xinput set-pointer  []
        xinput set-mode  ABSOLUTE|RELATIVE
        xinput list [--short || --long || --name-only || --id-only] [...]
        xinput query-state
        xinput test [-proximity]
        xinput create-master  [] []
        xinput remove-master  [Floating|AttachToMaster (dflt:Floating)] [] []
        xinput reattach
        xinput float
        xinput set-cp
        xinput test-xi2 [--root]
        xinput map-to-output
        xinput list-props  [ ...]
        xinput set-int-prop  [ ...]
        xinput set-float-prop  [ ...]
        xinput set-atom-prop  [ ...]
        xinput watch-props
        xinput delete-prop
        xinput set-prop  [--type=atom|float|int] [--format=8|16|32]  [ ...]
        xinput disable
        xinput enable
分別插入了“wch.cn USB2IIC?CTPCONTROL”和“ILITEK ILITEK-TP”兩個USB電容觸摸屏。
forlinx@forlinx:~$ xinput
? Virtual core pointer                          id=2    [master pointer  (3)]
?   ? Virtual core XTEST pointer                id=4    [slave  pointer  (2)]
?   ? wch.cn USB2IIC_CTP_CONTROL                id=9    [slave  pointer  (2)]
?   ? ILITEK ILITEK-TP                          id=6    [slave  pointer  (2)]
? Virtual core keyboard                         id=3    [master keyboard (2)]
    ? Virtual core XTEST keyboard               id=5    [slave  keyboard (3)]
    ? rk_headset                                id=7    [slave  keyboard (3)]
    ? rk29-keypad                               id=8    [slave  keyboard (3)]
    ? InputEmulator                             id=10   [slave  keyboard (3)]
forlinx@forlinx:~$ xinput map-to-output 6 eDP-1
forlinx@forlinx:~$ xinput map-to-output 9 HDMI-1
 電子發燒友App









評論